Tuesday, 2 November 2021

Tuscan Chicken from Fit Fast Cook


So.....I've found a new food warrior to follow.....Sarah from Fit Fast Cook....she's awesome....this is one of the recipes I have from her that I made tonight....Tuscan Chicken....I've change a couple of ingredients to fit with my WW journey and get those points down (although not much needs changing cos she's macro conscious as well!!)..Please go and see her on her fb page  Here 

This popped up recently and I really needed something saucy and tasty tonight so I gave it a whirl....OMG....so tasty. It serves 4 at 5 points per serving


Ingredients

4 Chicken breast
1 clove Garlic
1 tsp White Wine Vinegar
100g Half Fat Crème Frâiche
30g Parmesan Cheese
Large Handful Baby Spinach
60g Red onion
Tesco Pure Rapeseed Oil Spray
5spray(s)
100g No Drain Sun Dried Tomatoes

(The ingredients in the photo were for one portion... hubby was having something else!!)


Method

Flatten your chicken breasts in between cling film using a mallet or a rolling pin. Spray a frying pan with the spray oil and bring to a medium high heat. Add the the chicken and fry on each side for around 7+ minutes each side. Set aside.

Spray the pan with the oil again and add the onion, fry off until the onion is softened and browned over, add the garlic and sun dried tomatoes, gently fry for 2 minutes, add the vinegar, simmer for 1 minute , then add the creme fraiche, spinach and Parmesan, heat through, add the chicken, bring to a bubble then serve.  

Thanks Sarah 

Wednesday, 20 October 2021

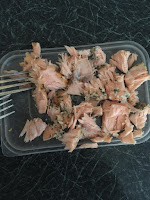
Salmon and Broccoli Crustless Quiche


I've been poorly (no....not THAT....tested and negative!!!) just that very annoying heavy cold thing that everyone has had....so I haven't been eating much....mainly soup ....so I had some stuff in the fridge that needed using up and put this together today.....sp are as follows:-

Green....3sp
Blue....3sp
Purple....1sp


Ingredients

whole medium eggs
150g Two Chicks Free Range Liquid Egg White
200g broccoli cut into florets
Tesco Ready to Eat Lemon & Parsley Hot Smoked Salmon Fillets 1fillet
1 tablespoon Fresh Dill finely chopped
60g Fat free natural cottage cheese
Salt and Black pepper to taste


Method

Preheat the oven to 180c/ 160c fan/ Gas mark 4.
Put the broccoli in a microwaveable dish with a couple of tablespoon of water. Cook in the microwave on full power for 2-3 mins until just cooked through. Remove and cover in cold water to cool down.
Meanwhile beat together the eggs and the egg white then add the cottage cheese and mix together, add the dill and mix to combine. Season with salt and black pepper.


Flake the salmon fillet into bite sized pieces and set aside


When the broccoli is cool enough to handle break it into bite sized florets and scatter evenly in the bottom of your ovenproof dish (some recipes advise that you should spray the inside of your dish with spray oil to prevent the mix from sticking, I've tried it with and without spraying and I find the results the same....it will stick!!....UPDATE....I wrote this when I was waiting for the quiche to cook but when I went to remove it from my NEW GLASS dish,,,no sticking...revelation!!!!). 


Add the egg mix and move the cheese around to ensure even distribution then top with the pieces of salmon pushing them down into the mix.


Bake in the centre of the oven for between 30-45 minutes until it has risen up and is browned all over.

Sunday, 19 September 2021

....so many tomatoes....!!!!


So recently we have been very lucky with the amount of tomatoes we have been getting from our greenhouse....lovely when you want a fresh tomato for your salad....but in the amount s we've been getting I can't eat that much salad!!!....so ....what to do with them. I'm a BIG fan of tomato sauce based dishes....spag bol and the like so the first and foremost thing for me to make was a batch of roasted tomato sauce. I preheat my oven to 160 fan (which would probably be about 180 on a regular oven, gas mark 4) and I line my baking tray with foil. The first thing I do is to remove the core ( I can't stand getting the core of a tomato in my mouth !!) I found this little gadget in a store (can't remember which store but you can buy them on Amazon Link here, they are meant for hulling strawberries but are just as effective in removing the core of a tomato. 


I then place them in a bowl and pour boiling water over them, I leave them for 30 seconds and then run cold water over them to cool them so that they can be handled, the skin simply slips off. I then cut them in half, place them on the baking tray and put them in the oven. They can take anywhere from 30 minutes to an hour so I leave them for 30 minutes and then just make sure I keep checking them every 10 minutes until they are nicely roasted down but not burnt. I then remove them from the oven and let them cool down. When they are cool I put them in batches into my mini food copper and whizz them into a paste, this will be a thick and luscious consistency which you can use in any of your tomato based sauce dishes, I think you could also use it as a base on your pizza although I haven't tried that yet. This sauce is in the centre picture on the left.


So then I had another batch of tomatoes come in and had only just made the sauce so felt that I should maybe explore other options. I posted on my WW fb page and someone made the suggestion of making tomato chutney, I thought "What a great idea"....so I began looking at recipes and found this one Link Here. It isn't a very complicated recipe to be honest its just chucking everything into pan really but I tweaked this recipe for two reasons....the first one is that it includes garlic which I usually leave out of foods because hubby and I eat different foods and the second one is obviously there is a lot of sugar in a chutney which doesn't fit with my WW life. 

Tomato Chutney

Ingredients

1 1/2 kg Red onions peeled and thinly sliced
Tomato
1k large, skinned and chopped
1 tsp chilli flakes
150ml Red Wine Vinegar
5 Cardamom Pods
1/2 tsp Paprika
100g Canderel Sugarly

Method

Tip all the ingredients into a large heavy-based pan and bring to a gentle simmer, stirring frequently. Simmer for 1 hr, then bring to a gentle boil (probably about another hour) so that the mixture turns dark, jammy and shiny. Place into sterilised jars and allow to cool before covering. Will keep for 6 weeks.

I have actually frozen two large batches of this chutney as there is only me eating it and I want to keep it for as long as possible.

So then another batch of tomatoes arrived in my kitchen so another WW friend suggested "sun dried" tomatoes. I googled and found this recipe Link here they are in the jar in the middle picture above.

Then the next batch turned up so I made passata Link here....this made 800ml of passata (it is the picture on the left above) which I have frozen in 200ml portions. When I made this passata I followed the recipe but I felt that when it was finished it was too thin to put on a pizza so my plan is that depending on what I am using it for I will decide if it needs to be reduced down (by boiling it).

....and finally my hubby went out yesterday and cleared the last of the tomatoes out of the greenhouse (!!!!) so my last outing with the tomatoes was....good old home made tomato soup (the picture on the right above. Back to google and this recipe from the BBC Good Food website Link here. This recipe was only for two portions and that meant that the ingredients didn't reach the minimum level in my soup maker so I made double the quantity (lets face it....I had the tomatoes !!!!) I didn't tweak this recipe at all although I did add a tablespoon of half fat creme fraiche before serving to give it a creamy consistency......absolutely stunning recipe.

Hope some of these ideas have given you some inspiration.

Lets stay strong guys

Sue x


Friday, 13 August 2021

Creamy Garlic Chicken


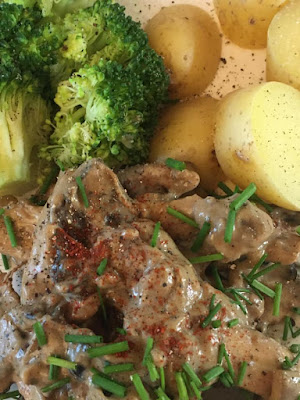
I've been reviewing the recipes in my WW recipe Builder and I've come across this....It was absolutely delicious. Its from those lovely talented ladies at Pinch of Nom (Original recipe Here)...I've slightly changed the ingredients and put it into the WW recipe builder the sp values are as follows:-

So the list of ingredients is how I would normally make this but I didn't have any Philadelphia lightest in so I used Philadelphia light Caramelised Onion which adds another point to the recipe, I served mine with steamed broccoli and 60g of new potatoes so the total amount on my plate was 3points.  Also I didn't have a garlic bulb in so I substituted a teaspoon of garlic puree. The recipe serves 2 but please remember if you change any ingredients or upscale the recipe it would be wise to recalculate the points.

Ingredients 

1 large chicken breast, thinly sliced
Salt and black pepper to taste 
Tesco Pure Rapeseed Oil Spray
2 teaspoons white wine vinegar
1 tablespoon Worcestershire sauce
1 chicken stock cube made up to 200ml with hot water
1 onion, thinly sliced
60g Mushrooms, sliced
1 clove garlic, minced
1 teaspoon Dijon Mustard, heaped
60g Philadelphia Lightest Soft Cheese
Chives for garnish (optional)
Paprika for garnish (optional)


Method

Spray a large frying pan with the oil and bring to a medium high heat. Add the mushrooms and onions and cook for a few minutes until browned and softened. Add the garlic and cook through a little more. Remove from the pan and set aside.
Spray the pan again with the oil and add the chicken pieces allow to brown all over. Remove and set aside with the onions and mushrooms.
Add the vinegar and Worcestershire sauce to the pan, scrape any browned bits off the bottom of the pan and allow to absorb into the liquid. Add the Dijon mustard and mix well. 
Add the stock to the pan and bring to the boil then reduce the heat to a simmer and allow the mixture to reduce to about half, stir in the cream cheese and stir to ensure there are no lumps.
Add the chicken, onions and mushrooms back to the pan. Allow to simmer for about 10-15 mins until you are sure that the chicken is cooked through and the onion mix is back up to temperature. If the sauce seems a little thick add a little water until you get the consistency you like.   


Thursday, 12 August 2021

Sea Bass and Mediterranean Potato Salad


This was lovely...I found it on the Tesco Food site (Original recipe Here)... it was originally a cold salad but I decided to serve it as a warm salad...but after hubby and I ate it we both decided that we felt we would enjoy it more if the vegetables were hot. The peppers are from a jar and therefore cold and the onions are not cooked either but the heat from the veg should warm them through sufficiently. The Tesco recipe recommended that the sea bass be grilled to get a nice crispy skin but I didn't want to do that so changed it up a bit. These flavours meld beautifully together. Recipe serves 4


Ingredients

4 seabass fillets
800g baby potatoes, halved, or quartered if large
200g pack fine beans, trimmed and halved
1 garlic clove, crushed (I left out the garlic because hubby had a meeting with a client the next day!!)
5g fresh basil leaves, very finely chopped
40ml red wine vinegar
1 1/2 tbsp extra-virgin olive oil
2 roasted peppers from a 460g jar, drained and sliced into strips
1 small red onion, thinly sliced
1 heaped tbsp sliced black olives in brine, roughly chopped
2 x 190g packs boneless sea bass fillets
10g fresh parsley leaves, roughly chopped

Method

Preheat the oven to 350deg F / 180deg C / 160deg C / Gas mark 4.
Take four pieces of foil and wrap each individual fillet, set aside until required.
Boil the potatoes until tender (I did mine for 20mins).
Put the beans in a lidded microwavable dish and add 1 tbsp of water, put the lid on and set aside.
Put the garlic, basil and vinegar in a small bowl. Slowly drizzle in 1½ tbsp oil, whisking continuously to emulsify, until well combined. Set aside.
12 minutes before your potatoes are cooked place the fish on a baking tray and place in the middle of the pre-heated oven. 
3 minutes before the potatoes are cooked put the beans in the microwave, cook on high for 3 minutes.
When the potatoes and beans are cooked put them into a large bowl, add the peppers, onion and olives. Drizzle over the oil and vinegar dressing, mix well. Stir in most of the parsley and serve on warm plates, top with the fish and sprinkle over the remaining parsley   


Friday, 6 August 2021

Lime Chicken Skewers with Mexican Cauli 'Rice' and Mango Salsa


This was delicious...its three separate recipes that I had in my recipe builder....I've searched for the original recipes and have found the recipe for Mexican Cauliflower Rice Here ...its from the amazing Laura at Skinnytaste...love her recipes. There are several recipes for Mango Salsa which are all pretty much the same 5 ingredients so that's easy to google ...I've tried to locate the original recipe for the Lime Chicken Skewers but they are made slightly different...they use honey or agave nectar and some use chilli instead ...this recipe uses the Lemon and Lime Jam that you put on your toast!! Hope you try it and like it.

Ingredients


For the Lime Skewers

4 chicken breasts skinless
5
ml White Wine Vinegar
medium Lime
Salt and Black pepper to taste
Black Pepper
45g Roses Lemon and Lime Marmalade


For the Mexican Cauliflower 'Rice'

1 head of Cauliflower
Spray Oil
1/2 Large Onion finely diced
1 large Tomato
1 red chilli, seeds and membrane removed and finely diced
Heaped Tablespoon Tomato Puree (or your preference)
1/2 teaspoons, level, Ground Cumin 
1/4 teaspoon level Smoked Paprika
1/4 Cayenne Pepper
Salt and Black Pepper to taste


For the Mango Salsa

medium Mango
1small Red onion
1 Red chilli deseeded and finely diced
1 tablespoon Lime Juice
tablespoon Coriander, fresh

Method


For the Mango Salsa

I make this first to allow it to sit in the fridge melding all the flavours together while I do everything else

Simply mix all the ingredients together in a non metallic bowl, cover and place in the fridge until needed.


For the Lime Skewers

Preheat the oven to 350F/ 180C/ 160 fan/ Gas mark 4 and put 8 wooden skewers in water to soak while you prepare everything (20mins is considered an appropriate length of time). 

Mix together the marmalade, vinegar, lime zest and juice. Season to taste.

Slice the chicken breast into thin slices and thread in a zig zag fashion onto the skewers. Arrange the chicken skewers onto a lined baking tray

Brush the dressing generously over the chicken. Place in the oven for 20 -25 minutes removing half way through to turn the skewers over and brush more lime mixture over.

For the Mexican Cauliflower Rice

Spray a frying pan with spray oil and bring to a medium-high heat. When hot, add the onions, tomatoes and jalapeno and sauté until just tender, about 2-3 minutes. Add the cauliflower and sauté until just tender, about 2 minutes.

Add the tomato paste, cumin, paprika, cayenne, salt and pepper. Stir to evenly coat the vegetables and cook for 1 minute or until heated through.

Serve a portion of the cauli rice with two skewers pre person and have the mango salsa ready to dip into....Heaven

Enjoy!!

Tuesday, 3 August 2021

Stuffed Bluecheese Portobello Mushrooms


Wowzer these were good...I don't know how they got into my recipe builder but I've been scrolling around looking for inspiration and saw these...they are 2 sp on all the WW plans. We had a great meeting this morning on our virtual group (although I couldn't stay long because I was on childcare duties...that's just a fancy word for playtime with my munchkins 😂)...

This is them 💓


I served mine with a light salad with a drizzle of Tesco Fat Free Vinaigrette. Because I was serving this with a salad and therefore didn't want a warm plate I warmed up a ceramic dish and served it in that, in hindsight I could have baked the mushrooms in the dish at the start.

This is one serving so as always if you increase the portion or change any ingredients please recalculate.

The original recipe is HERE

Ingredients 

2 Portobello Mushrooms
2 sprigs fresh Thyme
1/2 small red onion or shallot
1/4 medium red onion
2 Laughing Cow Blue Cheese Triangle
1/2 slice WW Danish Malted Bread
10g Parmesan cheese finely grated
Tesco Rapeseed Spray Oil
Salt and Pepper to taste
A few blades of chives

Method


Preheat the oven to 200C / 180C Fan / Gas mark 6.

Remove the stalks from the mushrooms place on a baking sheet and put the fresh thyme in the middle of each mushroom. Spray with the oil and bake in the oven for 10 mins.

Meanwhile chop the mushroom stalks, onion or shallot, and red pepper.

Spray a frying pan with the oil and place of a medium heat. Fry the mixture until softened.

Melt the blue cheese into the veg mix and season with salt and black pepper 

Whizz the bread in a mini chopper (you can use a grater to make breadcrumbs if you haven't got a mini chopper) and mix in the parmesan. 

Scoop the veg mixture into the middle of each mushroom and top with the parmesan breadcrumbs.

Bake in the oven for another 6-7 mins to get the topping crispy.

Snip the chives over the top to serve.


Saturday, 17 July 2021

WW Spicy Roasted Chickpeas


I've been meaning to do these for a LONG time and finally managed to get them done this week. Its a WW recipe but I have tweaked the method a little just to suit myself really. Perfect for sitting in front of the telly watching a film and at 0sp for the lot its pretty much guilt free

Lets stay strong guys

Sue
x

Ingredients 

1  400g tin of chickpeas

Spray oil

1 tsp Ground Cumin

1 tsp Paprika

Pinch of cayenne pepper

salt and black pepper to taste


Method 

Preheat the oven to 180deg C/160deg Cfan/ gas mark 4.
Empty the chickpeas into a sieve and rinse well under a running tap.
Dry thoroughly with kitchen roll (this will ensure that the chickpea snacks are crunchy when roasted). I noticed as I was drying the chickpeas that the skin was coming off some of them so I decided to remove the skin from them all. I was concerned that if the skins came off during the roasting process the flavour would be taken off with them. Its an optional step though.

Removing skin from chickpeas

Mix all of the other ingredients (except the spray oil) in a bowl (I had no ground cumin so had to use cumin seeds which I then ground in my mortar and pestle) and then add the chickpeas and mix well together.


Pour out onto a baking sheet lined with foil, spray with a little spray oil and roast in the oven for 45 minutes giving them a shake half way through.


The original recipe says to eat them warm but I don't feel that is necessary. Next time I do them I think I'll try different spices...not sure what yet but I'll update this post when I've done it

Enjoy
x x


Friday, 16 July 2021

Trio of Dips

 
So my WW group set us a challenge this week.....we were discussing how descriptions of food make us want to eat it and also about how eating something special makes you feel....so our challenge was to make our meals this week and then describe them in the M&S way!!!....you know...you've all seen the adverts....
So Thursday night hubby and I always quiz with Jay at Jays Virtual Pub Quiz and normally I have a boring egg mayo thin or something similar...so tonight I decided that I would step it up and I made three dips to have as a snack type supper....my favourite dip to have (until tonight) was smoked mackerel dip... so that was where I started. I googled it and found this recipe (I normally do something different)...Original recipe here 
So I browsed around in my pantry cupboard and found a jar of roasted red peppers that I bought (for what I can't remember!!!)....so google was employed again and I found this Roasted Red Pepper Pate  Original recipe here ...and the third dip came about because when I was spotting the jar of red peppers I saw a packet of olives....I LOVE olives so I thought I would do this Olive Tapenade...Original Recipe Here.....below are the results....you will notice that 2 of the recipes require garlic....but I don't often eat garlic when hubby hasn't so I left it out .....I don't think the recipes were compromised at all. 

This was my description posted on my WW fb sites

"Tonights offering....we always have a snack on Thursdays as we quiz with Jay every week, normally I have a boring egg mayo thin (or something similar) but given this weeks challenge I've stepped it up a bit...I have prepared...

A trio of lovingly hand crafted dips, lightly spiced roasted red pepper, a smoked mackerel pate infused with warm spices and a speedy and delicious olive tapenade, served with crispy fresh cucumber, sweet and flavoursome cherry tomatoes and home made Melba toast


Smoked Mackerel Pate


Ingredients


2 smoked mackerel fillets 
1/2 tsp Tesco Horseradish puree
1 tsp Dijon mustard 
freshly ground black pepper
2 tbsp creme fraiche
1/4 lemon juice only


Method 

Remove the skin of the fillets and place all ingredients into a food processor

Roasted red pepper pâté

Ingredients

2 grilled red bell peppers (from a jar)
1 Tbsp fresh lemon juice
2 tsp capers, drained
1 tsp ground cumin
1 tsp Canderel Sugarly
2 Tbsp chopped parsley


Olive dip

Ingredients

I packet of olives 
1 teaspoon of capers drained
1 tbsp creme fraiche
small sprig of parsley 
1 teaspoon lemon juice


Method

Add all ingredients to a food processor and mix together

Friday, 28 May 2021

Butter Bean Crumble


One of the things I've tried to do through my WW journey is to try new foods.....for example I used to hate aubergines and made myself buy one and then find a recipe....I came up with Aubergine Rolls (Recipe here) and now I frequently have a meat free Monday using this recipe...also people kept telling me about lentils and how they were low in sp and very versatile....so I bought some and made falafel (Recipe here)...so that brings me to butter beans....I've always said I LOATHE them....but thats because my mum used to open the tin, warm them up and put them on my plate....hated them. So I decided that I would try and change my mind on these too....good old Google brought me to this recipe (Original Recipe Here) which I tweaked slightly and I really like it....going to try it with different flavours. Hope you try it and like it as much as I did (oh....and hubby loved it too....result!!!)

Lets stay strong guys

Sue
x


Ingredients

1 small tin of butterbeans
2 tablespoons of Philadelphia soft cheese with Chives
1 slice WW Malted Danish bread
Spray oil


Method

Preheat the oven to 170 deg C fan.

Take about 1/3 of the butterbeans out of the tin into a bowl and mash them down until creamy.
Add the Philadelphia cream cheese and the rest of the beans and mix to combine. Blitz the bread in a food processor until it resembles breadcrumbs. Put the butterbean mix in a small ovenproof dish and top with the breadcrumb mix. Spray the top of the breadcrumb layer with the spray and put into the oven for about 15-20mins until the breadcrumbs have formed a crust and the mix is heated through.


Monday, 1 March 2021

Teriyaki Stir Fry sauce


This is a great versatile little sauce....it's really a stir fry sauce but it can be used in other ways too...Last night I had it as a stir fry with some prawns but the night before I had to use up a cooked salmon fillet so I put some of the sauce in a small frying pan and heated it through...I let it simmer for a little while to thicken it up, then I let it cool and added it to the flaked salmon...put it with a salad ...Teriyaki salmon salad...my grand-daughter also adds it to a salmon fillet then wraps it in foil and bakes it ...she swears by it!!!  It isn't much of a recipe as such just a bunch if ingredients that you chuck together. The original recipe asked for 1/2 teaspoon Chilli flakes but I found this a bit much so only use 1/4 teaspoon...obviously it depends on your own taste. Also the original recipe required sugar but I use Canderel Sugarly ....it's just like sugar and has no points in it (always a winner!!)

Ingredients

125ml Water
80ml Soy Sauce
1 tbsp Rice Wine vinegar
1 tablespoon Root Ginger
1/4 tsp Chilli Flakes
1 Tbsp Cornflour (mixed with a little water to make a slurry)
45g Canderel Sugarly

Method couldn't be easier...mix everything together!!

This makes enough for 4 servings (about 300ml) so I tend to keep the remainder in a small bottle in the fridge...the cornflour settles out so it needs a good shake before you use it again.

     Prawn Stir Fry           Teriyaki Salmon Salad


Sunday, 14 February 2021

Lemon Curd


Hi guys....I can't believe I haven't written this up on here before now!!! We were chatting about it on the  FB page run by my WW coach and when I went to look for the recipe it wasn't here!!...so I'll have to remedy that today....

I can't claim credit for this...it came from the lovely Janey at Slice of Slim (Original recipe Here)....the recipe calls for the juice of 1/2 lemon but to be honest I like my lemon curd zingy so I add the juice of a whole lemon....I'm also considering trying it with the zest as well....when I do I'll update this and let you know how it turned out...Janey recommends making it with lime, tangerine or grapefruit
 
 
Ingredients
 
2 Medium Eggs - yolks only
1/2 Lemon - juice only
1 tbsp Canderel Calorie Free Sweetener
3 tbsp Water

 
Method
 
Simply place all the ingredients into a bowl.


Place the bowl on top of a pan of simmering water on the hob. Make sure that the bowl is heat proof and is big enough to sit on top of the pan so that the bottom of the bowl does not touch the hot water below.


Whisk gently with a hand whisk, constantly until it thickens. This takes 5-10 minutes. It's really important to cook it by this slow method as you don't want to end up with scrambled eggs!


You will end up with a beautifully smooth, glossy mixture with a consistency similar to mayonnaise. At this point you might want to taste as you may wish to add a little more lemon juice or sweetener according to your personal taste.
 
 
At this stage you can sieve the lemon curd. In the past when I have made this I haven't seived but because I was doing this post today I decided to seive and see what the results were like. I can tell you that it isn't essential but I liked the texture so will be doing it every time I make it in future.


Decant it carefully into a suitable container. Allow to cool, then chill in the fridge.


So that's it....

Enjoy!!!

Lets stay strong guys
Sue
 

Sunday, 21 June 2020

Spicy Tomato Sardines


Wow!!! This was a revelation.....we were supposed to have Chilli Con Carne for supper tonight but for reasons I won't bore you with we had to change direction. Didn't know what to pull out of the fridge/freezer but while I was wondering about things I noticed a tin of sardines on the shelf. I remembered that I had been reviewing recipes in my recipe builder and came upon this one so I took the opportunity to do it....and it was fab. I know the photo looks a bit browned out but it really was delicious. A note to consider...the recipe calls for 2 tablespoons of lemon juice but I like lemon so I put the juice of a whole lemon into it.....it was really nice.

Ingredients

Spray Oil
1 medium Shallot finely diced
60g Passata
1 teaspoon Capers, in Brine
Zest of a Lemon
2 tablespoons of lemon juice
Pinch Chilli flakes
1 teaspoon Worcestershire Sauce
1 teaspoon Balsamic vinegar
Pinch of salt
1 (120g) Can of John West Boneless Sardines in Tomato Sauce


Method

Spray a frying pan with the spray oil. Soften the shallot for a few minutes.
Add the passata, chilli flakes, capers, lemon zest and juice, Worcestershire Sauce and balsamic vinegar. Stir to combine. Cook for a few minutes to combine flavours. Season well
Add the sardines and break them up into the sauce. Cook for a few minutes to warm through. Serve on pasta (adding the appropriate sp) or vegetable ribbons.